At EeStairs, we take CO₂ emissions into account throughout the entire production process.
Your configuration determines the estimated CO₂ emissions of your staircase, which are shown here. We display this to give you a clear view of the environmental impact.
At EeStairs, we measure CO₂ emissions at every stage of the production process, ensuring that sustainability is central at every step.
Each staircase configuration has its own ecological footprint, calculated based on material use, energy consumption, and production efficiency. We display this estimated CO₂ value here, so you know exactly what the environmental impact of your staircase is and can make informed choices.
Our advanced robotic assembly process reduces waste and increases precision, resulting in a smaller ecological footprint. We continuously improve our techniques, lower energy consumption, and use materials more efficiently — without compromising on quality or durability.
By choosing an EeStairs staircase, you choose a product that lasts for decades, reducing replacements and the related emissions. For us, sustainability means not only less emission now, but also efficiency and quality in the long term.
Special Colour Samples for €15
Explore our exclusive, internationally available Special Colour Samples, divided into three
categories: Urban Vertigo, Silica Storm, and Galactic Sky. These unique, visually stunning 1m2™
stair finishes will completely transform your interior. Free shipping across Europe.
Country of destination
Select the country your Clips™ will be located.
Services
Please select the services you require from us in terms of delivery.
Delivery
Installation can be performed either by yourself or by another installation company of your choice, as it is relatively easy with the assistance of our installation guide and video tutorial.
Transport Costs:
When placing a transport order, the provided transport costs are an estimate. In rare cases, actual costs may be higher due to unforeseen circumstances.
If the actual transport costs are 20% or more higher than the estimate, the difference will be charged to the client. This is to ensure reliable and efficient transport services.
Pick-Up
The Clips™ can be collected in Barneveld [NL] or Brantford [CA].
Comfort Steps
Comfort Steps apply when your stairs are wider or deeper than 1000 mm.
Want the smoothest and most comfortable way to walk up your stairs? Comfort Steps give you wider
treads, creating more space for your feet and ensuring a stable, natural step. This makes walking up
easier, especially if your stairs are frequently used or if you simply want extra comfort.
Strong & Durable Design
When you increase the width beyond 1000 mm, the stair material is upgraded for extra strength.
- Under 1000 mm: Steps are 4 mm thick
- Over 1000 mm: Steps are 5 mm thick
No matter the size, the steps are exceptionally strong and can hold up to 300 kg per step, ensuring
durability and safety.
Stairs wider than the opening.
Your staircase width doesn’t have to match the exact opening! Keep the upper section
aligned for a seamless fit while adding extra width at the base.
For example, if your stair opening is 1000 mm wide and enclosed by walls, a perfect fit
would be 940 mm. But if you have extra space at the bottom, extending the width allows for
an even more comfortable and secure walk up.
Nickel plating can be done in three different colours.
€ x / mDefault 1
Black and white
RAL 9001 - RAL 9023
€ x / mRAL9001
€ x / mRAL9002
€ x / mRAL9003
€ x / mRAL9004
€ x / mRAL9005
€ x / mRAL9006
€ x / mRAL9007
€ x / mRAL9010
€ x / mRAL9011
€ x / mRAL9016
€ x / mRAL9017
€ x / mRAL9018
€ x / mRAL9022
€ x / mRAL9023
Brown
RAL 8000 - RAL 8029
€ x / mRAL8000
€ x / mRAL8001
€ x / mRAL8002
€ x / mRAL8003
€ x / mRAL8004
€ x / mRAL8007
€ x / mRAL8008
€ x / mRAL8011
€ x / mRAL8012
€ x / mRAL8014
€ x / mRAL8015
€ x / mRAL8016
€ x / mRAL8017
€ x / mRAL8019
€ x / mRAL8022
€ x / mRAL8023
€ x / mRAL8024
€ x / mRAL8025
€ x / mRAL8028
€ x / mRAL8029
Grey
RAL 7000 - RAL 7048
€ x / mRAL7000
€ x / mRAL7001
€ x / mRAL7002
€ x / mRAL7003
€ x / mRAL7004
€ x / mRAL7005
€ x / mRAL7006
€ x / mRAL7008
€ x / mRAL7009
€ x / mRAL7010
€ x / mRAL7011
€ x / mRAL7012
€ x / mRAL7013
€ x / mRAL7015
€ x / mRAL7016
€ x / mRAL7021
€ x / mRAL7022
€ x / mRAL7023
€ x / mRAL7024
€ x / mRAL7026
€ x / mRAL7030
€ x / mRAL7031
€ x / mRAL7032
€ x / mRAL7033
€ x / mRAL7034
€ x / mRAL7035
€ x / mRAL7036
€ x / mRAL7037
€ x / mRAL7038
€ x / mRAL7039
€ x / mRAL7040
€ x / mRAL7042
€ x / mRAL7043
€ x / mRAL7044
€ x / mRAL7045
€ x / mRAL7046
€ x / mRAL7047
€ x / mRAL7048
Green
RAL 6000 - RAL 6037
€ x / mRAL6000
€ x / mRAL6001
€ x / mRAL6002
€ x / mRAL6003
€ x / mRAL6004
€ x / mRAL6005
€ x / mRAL6006
€ x / mRAL6007
€ x / mRAL6008
€ x / mRAL6009
€ x / mRAL6010
€ x / mRAL6011
€ x / mRAL6012
€ x / mRAL6013
€ x / mRAL6014
€ x / mRAL6015
€ x / mRAL6016
€ x / mRAL6017
€ x / mRAL6018
€ x / mRAL6019
€ x / mRAL6020
€ x / mRAL6021
€ x / mRAL6022
€ x / mRAL6024
€ x / mRAL6025
€ x / mRAL6026
€ x / mRAL6027
€ x / mRAL6028
€ x / mRAL6029
€ x / mRAL6032
€ x / mRAL6033
€ x / mRAL6034
€ x / mRAL6035
€ x / mRAL6037
Blue
RAL 5000 - RAL 5026
€ x / mRAL5000
€ x / mRAL5001
€ x / mRAL5002
€ x / mRAL5003
€ x / mRAL5004
€ x / mRAL5005
€ x / mRAL5007
€ x / mRAL5008
€ x / mRAL5009
€ x / mRAL5010
€ x / mRAL5011
€ x / mRAL5012
€ x / mRAL5013
€ x / mRAL5014
€ x / mRAL5015
€ x / mRAL5017
€ x / mRAL5018
€ x / mRAL5019
€ x / mRAL5020
€ x / mRAL5021
€ x / mRAL5022
€ x / mRAL5023
€ x / mRAL5024
€ x / mRAL5025
€ x / mRAL5026
Violet
RAL 4001 - RAL 4012
€ x / mRAL4001
€ x / mRAL4002
€ x / mRAL4003
€ x / mRAL4004
€ x / mRAL4005
€ x / mRAL4006
€ x / mRAL4007
€ x / mRAL4008
€ x / mRAL4009
€ x / mRAL4010
€ x / mRAL4011
€ x / mRAL4012
Red
RAL 3000 - RAL 3033
€ x / mRAL3000
€ x / mRAL3001
€ x / mRAL3002
€ x / mRAL3003
€ x / mRAL3004
€ x / mRAL3005
€ x / mRAL3007
€ x / mRAL3009
€ x / mRAL3011
€ x / mRAL3012
€ x / mRAL3013
€ x / mRAL3014
€ x / mRAL3015
€ x / mRAL3016
€ x / mRAL3018
€ x / mRAL3020
€ x / mRAL3022
€ x / mRAL3027
€ x / mRAL3028
€ x / mRAL3031
€ x / mRAL3032
€ x / mRAL3033
Orange
RAL 2000 - RAL 2013
€ x / mRAL2000
€ x / mRAL2001
€ x / mRAL2002
€ x / mRAL2003
€ x / mRAL2004
€ x / mRAL2008
€ x / mRAL2009
€ x / mRAL2010
€ x / mRAL2011
€ x / mRAL2012
€ x / mRAL2013
Yellow
RAL 1000 - RAL 1037
€ x / mRAL1000
€ x / mRAL1001
€ x / mRAL1002
€ x / mRAL1003
€ x / mRAL1004
€ x / mRAL1005
€ x / mRAL1006
€ x / mRAL1007
€ x / mRAL1011
€ x / mRAL1012
€ x / mRAL1013
€ x / mRAL1014
€ x / mRAL1015
€ x / mRAL1016
€ x / mRAL1017
€ x / mRAL1018
€ x / mRAL1019
€ x / mRAL1020
€ x / mRAL1021
€ x / mRAL1023
€ x / mRAL1024
€ x / mRAL1027
€ x / mRAL1028
€ x / mRAL1032
€ x / mRAL1033
€ x / mRAL1034
€ x / mRAL1035
€ x / mRAL1036
€ x / mRAL1037
Silica Storm Collection
€ x / m103
€ x / m105
€ x / m107
€ x / m109
Urban Vertigo Collection
€ x / m203
€ x / m205
€ x / m207
€ x / m209
Galactic Sky Collection
€ x / m303
€ x / m305
€ x / m307
€ x / m309
Design RAL
€ x / m1405010
€ x / m1104010
€ x / m080640
€ x / m3012 Fine Str
€ x / m2806020
€ x / m0605040
€ x / m7030 Fine Str
€ x / m1015 Fine Str
How to measure?
This guide provides you with detailed steps to accurately measure your space to ensure that your
new staircase fits perfectly and enhances your environment. Follow these instructions closely to
prepare for a successful installation. Let’s get started with the essential measurements.
Essential dimensions
Width Stairs
Measure the Stairwell: Use a tape measure to find the distance
across the
stairwell where your stairs will fit.
Adjust for Clearance: Deduct 60 mm from your stairwell
measurement to maintain a
30 mm gap on each side, ensuring everything fits nicely and operates smoothly.
Tip – Consider Wider Steps.
You can make the bottom four steps wider than the stairwell width, while keeping the
top
consistent for a perfect fit. Feel free to add extra width at the bottom!
For example, if your stairwell is 1000 mm wide and there are walls on both sides, the
ideal staircase width would be 940 mm. However, if you have room for wider steps at the
base, you can make the stairs as wide as you wish.
Depth Stairs
Measure the Stairwell Depth: Use a tape measure to determine
the distance from the front to the back of the stairwell.
Allow for Clearance: Subtract 30 mm from your measurement to
keep a free space between the back of the stairs and the stairwell wall, enhancing
functionality and safety.
For example, if your stairwell is 1000 mm deep, the ideal staircase depth would be 970 mm.
This simple measurement ensures a proper fit and smooth operation of your staircase.
Height Stairs
Measure Vertical Distance: Using a tape measure, determine the
height from the floor at the bottom of the stairs to the top of the floor on the next level.
Account for Floor Finish: Make sure to measure after any floor
finishes (like carpet or tiles) have been laid, to include their thickness in your height
calculation.
For instance, if the vertical distance measures 2700 mm from one floor to the next, that is
the height you should use for your stairs. This straightforward approach ensures your
staircase connects smoothly between floors.
Optional dimensions
Width Stairwell
Measure Horizontally: Use a tape measure to record the
horizontal distance across the stairwell at the widest point.
That’s it! This quick measurement will help you determine the maximum available space for
your
staircase.
Width Stairwell
Measure Front to Back: Use a tape measure to determine the
distance from the front edge of the stairwell to the back.
This quick step ensures you know the total depth available for installing your staircase.
Floor Thickness
Measure Thickness: Directly measure the thickness of the floor
at the stair opening from the top surface to the bottom.
This measurement generally does not affect the dimensions of your staircase, unless the
entered
value is exceptionally high or low.
Mounting Hole Height
Measure Downward: From the top edge of the floor where the
staircase will be attached, measure 70 mm downward. This is your initial mounting hole height.
Check for Obstructions: Inspect the area for any obstructions
(like electrical wiring, plumbing, or beams) that might prevent drilling at this height.
Adjust if Necessary: If obstructions are found at the 70 mm
mark, determine a new height for the mounting holes where it’s clear to drill safely.
Base Plate Hidden in Screed
When installing your staircase, it’s crucial to know whether the base plate will be hidden in
the screed or mounted on the finished floor:
Not on Finished Floor: If the staircase base plate is to be
embedded within the screed (the layer beneath the final floor finish), measure the thickness
of
the screed. Enter this measurement as the value for ‘Base Plate Hidden in Screed’.
On Finished Floor: If the staircase will be attached directly
to
the finished floor, keep the value at 0. This indicates that the base plate is not hidden and
sits flush with your finished floor level.
This setting helps ensure that your staircase installation aligns perfectly with your
flooring
setup, whether it’s embedded within the screed or mounted on the finished surface.
Still Having Trouble with Your Measurements?
If you’re finding it difficult to get the right measurements or have any concerns about
the
configuration, don’t worry—we’re here to help! Once you’ve done your best with the
measurements and completed the configuration, take advantage of our ‘Expert Review’
option.
Here’s how to proceed:
Complete Your Configuration – Finish setting up your staircase using the
measurements you’ve taken the best you can.
Request an Expert Review – Submit your configuration along with images of
your stairwell and any areas you’re unsure about.
Tell Us Your Concerns – When requesting the review, include any specific
questions or concerns you have.
An EeStairs expert will review your information and get back to you with guidance and
support
to ensure everything is set up perfectly. We’re here to ensure that your installation goes
smoothly!
Options
The image on the left shows the default option. The image on the right illustrates what it looks
like when the optional feature is added.
Easy Accessibility
For spaces where maneuvering a single, large structure is challenging, our 1m2™ stairs offer a
practical solution. They can be supplied in two halves that securely attach almost seamlessly.
This design not only simplifies the transportation and installation process but also ensures that
the staircase can be moved through restricted spaces with ease. Choose the Easy Accessibility
option for a straightforward, hassle-free setup in any location.
Riser Bars
Riser bars add safety and stability to your staircase. They are the vertical elements that fill
the open space under each step, preventing objects or feet from slipping through. Our riser bars
are designed not only for functionality but also to complement the modern aesthetics of your
stairs. With easy installation, they are an essential component for ensuring your staircase meets
both safety standards and your personal style preferences.
Remove Anti-skid Plugs
While the Anti-skid plugs on our 1m2™ stairs offer additional safety by preventing slipping, some
opt to remove them for a more streamlined look. It’s important to note that doing so could
increase the likelihood of slipping. For the best balance of style and safety, we recommend
keeping the Anti-skid plugs, ensuring each step is secure underfoot.
Removable Handrail Section
By easily unscrewing the top section of the handrail, you create temporary extra space around the
stair opening, making it easier to move large or awkward items. Once finished, simply reattach the
top section to maintain the sleek look of the 1m2™ by EeStairs.
Lowered Top Tread
When customizing your 1m2™ stairs, you can choose a regular top step that is flush with your
floor level or opt for a lowered top tread, which is one step down from the floor level. The
latter is often preferred for access to roof hatches and similar setups, and it includes a
handrail whose top can be easily screwed on or off to suit the unique height requirement.
Stainless Steel Handrail
The standard handrail is made of mild steel, matching the rest of the staircase in color. The
stainless steel handrail has a brushed finish and is not powder-coated.
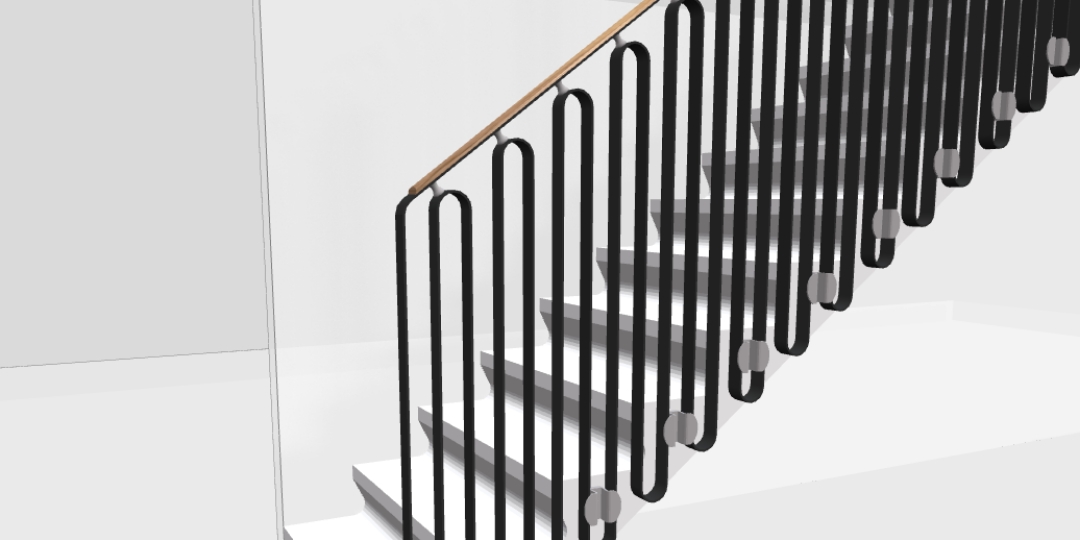
Void Balustrades
Our void balustrades are designed to encircle your stairwell, providing an extra layer of safety
without compromising on style. Standing at a precise height of one meter and customizable in
width, they are tailored to fit the dimensions of your space. The balustrades will match the color
finishing of your 1m2™ stairs for a cohesive look. Whether you’re looking to safeguard an open
stairwell or delineate an area, these railings are an essential addition, ensuring peace of mind
with their robust construction and sleek design.
Revisit your configuration
Enter your details to easily revisit your configuration later.
Railings
These are the Clips™ railings mounted on one or both sides of the staircase.
Handrails
Select whether to install a wall-mounted handrail along the staircase.
None
Selecting “–” means no (wall)railing will be added to this part of the stairs.
Floor-to-Floor Height
Enter the vertical height between two floors (FTF height) and specify how many floors this height applies to.
Each row contains:
FTF height
The height between two consecutive floors
Amount of floors
How many times this height repeats.
Floors
Defines which floors this height applies to. Use the plus/minus buttons to shift the floor range.
Use ‘Add’ to insert another row.
Use plus/minus buttons to adjust number of floors and floor range.
Void Balustrades
Void balustrades are installed around an open void or mezzanine to provide safety and a continuous design flow. They visually connect upper levels while preventing falls.
Void balustrades
Enter the length and quantity of the void railings. Tick "Base" if a Void Balustrade Base Profile is required for this length. The base profile is the bottom fixing profile used to mount or support the railing along the edge of the void.
Geometry
Lorem ipsum dolor sit amet, consectetur adipiscing elit. Mauris consectetur quam eget purus malesuada commodo. Nullam tempus rhoncus aliquet. Nunc urna nisi, vehicula vitae
venenatis vel.
Include provisional sum for install
Use this function to include your own installation, service, or other additional costs on top of the product price. You can enter either a fixed
amount or calculate a value based on the dimensions of the stair or balustrade. If this does not apply to your situation, you can simply skip this section.
Title
Price
Title
Amount (m)
Price / m
Total
Warning!
Warning: you are about to edit a staircase, all changes will be saved immediately!
Warning!
The configuration has changed in another tab. Reload to sync with your latest selection